How to Install Rep AI on Shopify: App Embed, Setup, and Launch
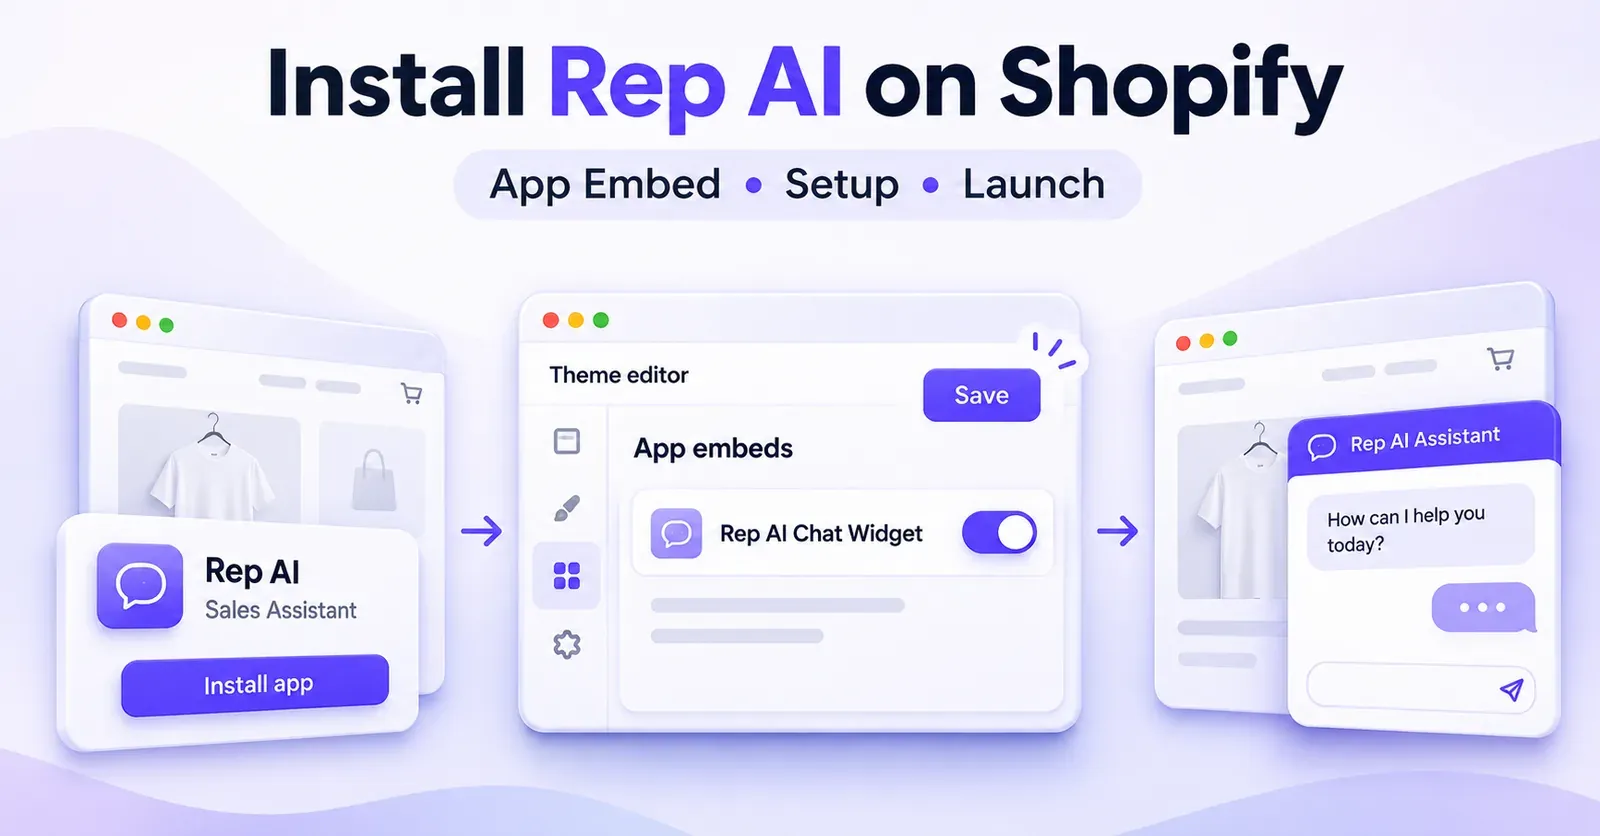
To install Rep AI on Shopify, add the official Rep AI app from the Shopify App Store, authorize the connection to your store, enable the Rep AI Chat Widget app embed in your published Shopify theme, and click Save. Then complete Rep's onboarding, test your assistant, and launch the chat when it is ready for shoppers.
The distinction between installed, connected, embedded, and live matters. Installing the app does not, by itself, prove that customers can see or use the assistant. Likewise, switching an app embed on without saving the theme does not finish the activation step.
There is also an important update for existing users: Rep has instructed stores still using its older script-tag installation to enable the Shopify app embed before March 1, 2027, to keep the chat available. Merchants who already have the app embed enabled in their published theme do not need to repeat that activation solely because of this notice.
This guide covers the standard Shopify storefront installation, a practical prelaunch checklist, the legacy-installation transition, and the most useful first checks if your chat does not appear. It focuses on getting Rep AI installed correctly rather than configuring every advanced AI feature or diagnosing every possible chat problem.
Rep AI installation at a glance
| Phase | What to do | How to tell it worked |
|---|---|---|
| Install | Add the official Rep AI app through Shopify | Rep appears among your installed apps |
| Connect | Complete the Rep account and Shopify authorization flow | Shopify shows as Connected in Rep's integrations |
| Embed | Turn on Rep AI Chat Widget in the published theme's App embeds | The switch is on and you have clicked Save |
| Prepare | Check products, basic appearance, and example conversations | Your test responses and storefront preview meet your expectations |
| Launch | Complete Rep's final onboarding and visibility steps | The assistant is available on the public storefront and can answer a real test message |
For a new installation, follow the steps in order. If you already have Rep connected, skip to the relevant activation or verification step instead of reinstalling an app that is working.
Before you begin: the four things to check
1. Make sure you are using the official Shopify app
The Shopify App Store lists the Rep application under REP AI: AI Sales & Support, developed by Rep AI Technologies Inc. You may also encounter the names Rep AI, Rep, AI Concierge, or AI Brand Concierge in older onboarding screens and help articles. Those labels can refer to the same product ecosystem, not necessarily to separate apps you must install.
Start from the official listing inside the Shopify App Store rather than searching for an unfamiliar installer or third-party snippet. The app listing is also the appropriate place to review current compatibility information, privacy information, and the pricing description shown to merchants.
 Quentin Olaya

2. Confirm you have the necessary Shopify access
You need permission to install apps and to approve the access Shopify asks you to grant. Later, you or another authorized team member must be able to edit the published online-store theme. If those responsibilities belong to different people, coordinate before you start.
Shopify shows the app's requested access during installation. Read those permissions, including the categories of store and customer data involved, rather than assuming that any third-party commerce integration is read-only. The exact requested permissions can change; the installation screen is the appropriate place to review them for your store.
3. Identify the currently published theme
In Shopify admin, open Online Store → Themes and identify the theme customers are actually visiting. A development or unpublished draft theme is useful for testing, but enabling an embed on that draft is not the same as activating it on the live storefront.
This is especially important for stores in the middle of a redesign. Shopify app embeds belong to individual themes. If you publish a different theme later, check whether Rep is activated in that new theme as well.
4. Set expectations about pricing and launch
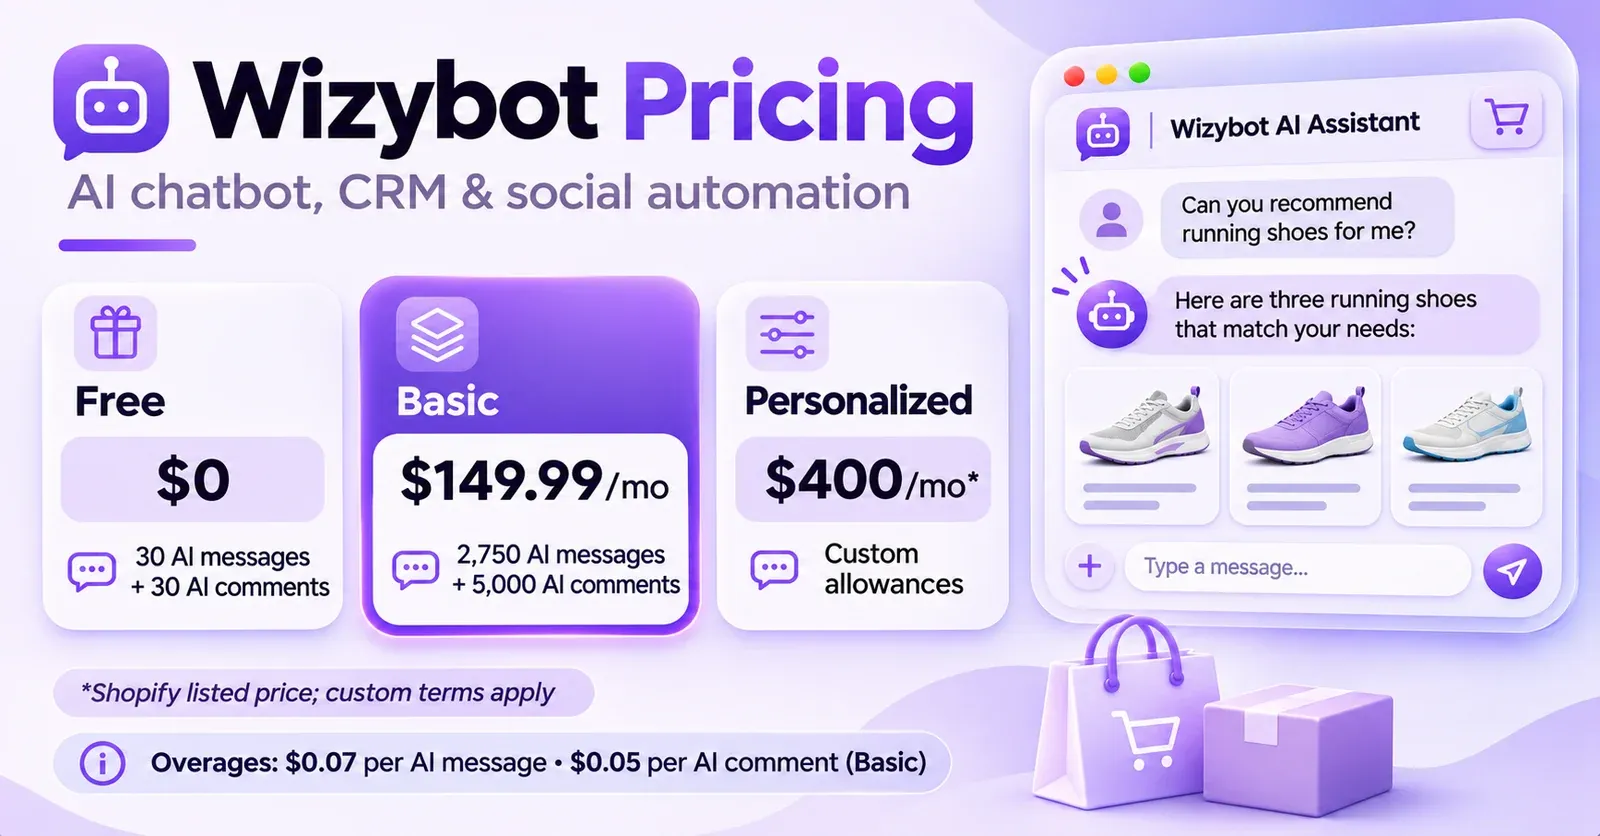
The Shopify listing can describe Rep as free to install and may advertise a trial. That wording does not mean production use is unlimited or permanently free. Depending on the product and plan you select, subscription or usage charges may apply. Check the current offer when choosing a plan rather than treating the app-installation button as a billing guarantee.
For this installation guide, the goal is to get the integration and visibility right. Detailed plan comparisons, usage units, overages, and billing decisions belong in a separate pricing review.
Step 1: Install Rep AI from the Shopify App Store
Begin in the Shopify App Store and locate the official REP AI: AI Sales & Support listing. Check the developer name, then choose Install.
Shopify will present an installation and authorization screen. Depending on your account and current app requirements, you may be asked to sign in, confirm store details, or review access to categories of store data. Read the permissions and the linked policies carefully. If they are acceptable for your business, confirm installation using Shopify's on-screen control.
After authorization, Shopify makes the app available from the Apps area of your admin. Opening it should take you into Rep's setup or account experience. If the screens differ slightly from a screenshot you saw in an older tutorial, follow the labels in your current admin rather than assuming the integration failed.
What this step achieves: Rep is installed as a Shopify application. It does not yet guarantee that your assistant is visible on product pages, that every product is ready for answers, or that Rep has been launched publicly.
What to check:
- The application you installed is the official Rep listing, not a similarly named third-party app.
- You have approved the permissions that Shopify presented.
- Rep is accessible from your Shopify apps or its own console.
- You can proceed to connect the intended store, rather than accidentally onboarding a second store.
If Shopify refuses the install because of your role, ask the appropriate store administrator to review permissions. Do not attempt to work around the authorization process by copying code from an unrelated installation guide.
Step 2: Connect your Shopify store to Rep AI
During initial onboarding, Rep prompts you to connect your Shopify store. Follow that guided flow and approve any Shopify authorization request that belongs to the connection process.
If you need to reconnect an existing store, or simply verify the connection later, Rep documents this route in its console:
Settings → Integrations → Catalog → Shopify → Connect
When prompted, use your shop's permanent myshopify.com address. This is not necessarily the branded domain shoppers type into their browsers. For example, a merchant might sell under a custom domain while the underlying Shopify address remains your-store.myshopify.com.
You can find that store address in your Shopify admin settings. Once you enter the correct address, Rep directs you through Shopify's authorization process. After approving it, return to Rep and look for the Shopify integration to show Connected.
Why this connection matters
The store connection is how Rep can work with Shopify commerce information instead of behaving like a generic chat widget with no knowledge of what you sell. Rep's documentation describes product-catalog synchronization and access to relevant store information used to support shopping conversations.
The connection is therefore a separate requirement from the visual app embed. A chat may be present on a page, but that alone does not tell you whether the underlying catalog integration is healthy. Conversely, a Connected label in the console does not establish that a customer can open the assistant on your live theme.
After connecting, check that the correct shop appears in Rep. Businesses operating multiple storefronts should verify the store identity before making assumptions about products or launch status.
Avoid common connection mistakes
Do not substitute a temporary preview URL for the permanent Shopify store address when Rep requests myshopify.com. Do not assume that signing in to a Rep account automatically authorizes access to a specific Shopify shop. And do not infer from a successful connection that every later installation step has also completed.
If the integration is missing or disconnected, revisit the documented connection path and complete the authorization process. If the screen requests access you are not authorized to grant, involve the store owner or an appropriately privileged administrator.
Step 3: Enable the Rep AI app embed in your published Shopify theme
This is the most important storefront-specific step, and it is easy to misunderstand. Rep uses Shopify's app embedmechanism to activate the chat integration in a standard Shopify theme. For this normal installation route, you should not need to edit Liquid files by hand just to turn on the embed.
There are two useful ways to reach the setting.
Option A: Activate the embed from Rep onboarding
During Rep's guided onboarding, you may see a step named Activate the Rep tag and a control labeled Activate Tag.
- Select Activate Tag in Rep.
- A Shopify theme-editor tab opens for the app-embed activation.
- Confirm that the Rep app embed is selected and switched on.
- Click Save in the Shopify theme editor.
- Return to the Rep onboarding tab and continue when the saved activation is detected.
The theme editor can open with the switch already showing On. That is not the end of the task. Clicking Save is required for Shopify to store the activation. Returning to Rep without doing so is one reason an onboarding checklist can seem stuck on the embed step.
The wording of individual buttons may evolve, but the principle remains the same: activate the embed on the correct theme, save the change in Shopify, then continue onboarding in Rep.
Option B: Enable it directly in Shopify
If you prefer to manage the embed yourself, or Rep's activation shortcut is unavailable, go directly through Shopify:
- Open your Shopify admin.
- Navigate to Online Store → Themes.
- Identify the currently published theme.
- Open Edit theme for that theme.
- Select App embeds in the theme editor.
- Find Rep AI Chat Widget.
- Turn the embed On.
- Click Save.
That is the explicit path Rep describes for app-embed activation. If you cannot find Rep under App embeds, do not conclude that all Shopify themes are incompatible. Double-check that the official app is installed, identify your theme, and contact Rep support with your store URL and theme name if the entry remains missing.
Why the published theme matters
Shopify stores often have several themes: the one currently published and one or more draft or backup themes. You may edit a draft while preparing a redesign, but the public storefront keeps using the published theme until you change it.
If Rep is switched on only in a draft, a shopper visiting your store may not see it. Rep's November 2026 guidance specifically instructs merchants to activate the embed in the published theme when they want the chat available to current visitors.
After a theme change, repeat the verification. An app embed activated in one theme is not a promise that it will be active in every other theme you publish in the future.
App embed versus app block: do not mix them up
In Shopify, an app embed and an app block are not interchangeable terms. App embeds can provide floating or overlay functionality, or code that runs in the storefront. App blocks are placed into particular sections or templates.
For the standard Rep AI chat activation described here, look under App embeds for Rep AI Chat Widget. If you are later working with a special product-page placement or another Rep interface component, that can involve a different configuration. It should not prevent you from completing the basic chat installation first.
Step 4: Confirm that your Shopify catalog is available in Rep
Once the integration is connected, Rep documents an automatic Shopify product sync. In its console, you can inspect the products through:
AI Sales → Catalog → Product
For installation purposes, the useful question is not whether a generic integration badge looks healthy. It is whether Rep can actually find the products you expect the assistant to discuss.
Open the product view and spot-check several items from your live assortment. Choose examples that represent different kinds of merchandising information, such as a product with variants, a sale item, and an ordinary full-price product.
Check the item names and information you can see. If your test product is missing or unexpected, investigate before launch rather than relying on the assumption that a successful connection guarantees every data field is instantly ready. Rep documents automatic synchronization, but this should not be turned into a universal promise about seconds, timing, completeness, or a service-level commitment.
You normally do not need a separate CSV import merely to make the standard Shopify catalog connection work. If your business needs external knowledge sources, special product exclusions, metafields, or complex catalog logic, treat that as additional setup rather than part of the initial app installation.
A quick catalog acceptance test
Use a simple three-product sample:
| Sample | What you are checking | Why it helps |
|---|---|---|
| Best seller | Product appears and can be identified by name | Confirms a basic catalog item is present |
| Variant-based product | The relevant options are represented sensibly | Helps reveal whether a later conversation needs closer review |
| Recently added product | Current catalog data is discoverable | Flags possible data freshness questions |
This table is a merchant testing suggestion, not a claim that Rep guarantees an identical view of every field for every store. If one of these checks fails, document exactly what you observed and review the catalog connection before treating the assistant as ready.
Step 5: Configure the minimum viable chat experience
After app-embed activation, Rep's onboarding continues with chat appearance, assistant personality, training, testing, and launch. You do not need to perfect every advanced feature before determining whether the installation works, but you should make a few deliberate choices.
Rep documents Settings → Chat Widget as a starting point for visual settings. Its current design experience includes controls for the widget's visual identity and chat experience, though exact options can depend on the style and settings available in your account.
Give the chat a recognizable appearance
Check that the assistant's design looks appropriate alongside your brand. Review its main colors, title or introductory presentation, and position on the storefront. A clearly identified support or shopping assistant is easier for visitors to interpret than an unexplained floating icon.
Keep this first pass practical. Avoid getting absorbed in complex custom CSS, intricate segmentation, or every possible prompt setting. You can return to those decisions after confirming the core installation and observing real conversations.
Prepare a few useful answers
Rep's performance depends in part on the information and instructions you provide. Pick common questions a visitor might reasonably ask while shopping: a product's intended use, a size-related question, a delivery-policy question, or how to get help from a human.
Do not ask the assistant to invent store policies you have not supplied. If a return window or shipping rule is important, verify the underlying policy content in your store and Rep's knowledge setup before expecting a reliable answer.
Keep launch under your control
A successful integration is not the same as a decision to expose an unfinished assistant to shoppers. Rep's onboarding documentation distinguishes activation of its tag or embed from the later launch step. Use that separation to test before making the interface public.
This also reduces confusion when someone on your team reports, “The embed is on, but I can't see the chat.” During onboarding, that can be expected. You still need to complete the launch sequence.
 Quentin Olaya

Step 6: Test Rep AI before going live
Rep provides a Test & Train area for reviewing how the assistant would answer example messages. Its Chat simulator is intended for storefront-chat testing, while other channel simulations may be available when their associated integrations are connected.
For the installation workflow, start with the Chat tab. It lets you examine proposed responses privately. A message sent in this simulator is not a live message delivered to a real customer.
Use a small but meaningful test plan
Try at least the following scenarios:
- Basic greeting: Ask what the assistant can help with. Check whether the answer describes your store appropriately.
- Known product: Ask for a specific product you verified in the catalog. Look for the expected product or a sensible response.
- Product selection: Describe a real use case and assess whether the answer is relevant rather than generic.
- Policy question: Ask about a shipping or return policy you have supplied. Look for fidelity to the actual wording and conditions.
- Unknown information: Ask about something the assistant should not know. Check whether it avoids confident inventions.
- Human help: Ask to speak with a person. Verify that the response matches the handoff arrangements you actually configured.
- Mobile context: Check the customer-facing widget presentation on a mobile-sized screen before launch.
When you find a poor answer, use Rep's testing and training tools to correct the information or adjust instructions. Do not simply assume that connecting Shopify turns every assistant answer into verified truth.
Keep your test evidence specific
A useful test note includes the question asked, what Rep replied, the expected answer, and whether the problem concerns catalog data, store policy, wording, or a missing configuration. That distinction helps your team avoid treating every disappointing response as an installation failure.
For example, a catalog item missing in Rep is a different issue from a correctly loaded item receiving an unhelpful recommendation. The first suggests reviewing data availability; the second points toward content, instructions, or behavior. Both matter before launch, but they require different next actions.
Do not confuse test channels with enabled live channels
Rep's current Test & Train documentation distinguishes storefront chat from email and Meta channels. Some channel simulators can show how the AI would respond even when live AI answering for those channels is not enabled. Other channel tabs depend on relevant integrations.
Therefore, seeing an email or social preview does not prove that installing the Shopify app automatically activates replies on Instagram, WhatsApp, Facebook, or a connected helpdesk. Treat those integrations as separate projects with their own permissions, testing, and launch controls.
Step 7: Launch Rep AI and verify the public storefront
When your basic configuration and test conversations are satisfactory, complete the remaining onboarding and launch controls in Rep. Older official guides describe a Get Started checklist and a final launch step that can include choosing a plan. The precise screen labels and offer available to your account may have changed, so follow your current console rather than relying on an archived screenshot.
Rep also documents controls for whether its chat widget is active and visible. If you have enabled the Shopify app embed but deliberately left the widget inactive, the lack of a public chat may reflect that visibility choice, not a failed installation.
Once you have launched, open your real storefront rather than relying only on the Rep console or Shopify editor. Visit a normal page a shopper would use, such as a product page. Check whether the chat can be opened, then send an ordinary test message.
Where practical, repeat the check on a mobile device or mobile viewport. A chat that is technically present but covers an essential store control can still create a poor customer experience. A quick review is worthwhile before treating the rollout as complete.
Five launch checks that actually demonstrate readiness
| Check | Pass condition |
|---|---|
| Shopify connection | The correct shop is shown as connected in Rep |
| Published theme | Rep AI Chat Widget is enabled and saved in the live theme |
| Product knowledge | Representative catalog products are available for test questions |
| Launch status | Rep's final onboarding and visibility controls allow the assistant to appear |
| Public conversation | You can open the chat on the actual storefront and receive a relevant reply |
This is a practical launch checklist, not a universal guarantee of compatibility or customer outcomes. It confirms that the main installation path works for your observed store and theme.
Existing Rep AI installation? Check the March 1, 2027 app-embed deadline
If Rep was installed in your Shopify store some time ago, you might not need to repeat every step above. However, Rep published a specific notice on November 9, 2026 about stores using its older script-tag installation.
The notice says these stores need Rep's Shopify app embed enabled before March 1, 2027 to keep chat available to shoppers. This is a forward-looking transition deadline, not evidence that Shopify had already disabled every legacy script-tag installation in November 2026.
The scope of the requirement matters:
- Still using the older script tag: follow the app-embed activation process before the stated deadline.
- App embed already enabled in the published theme: Rep says no additional activation is needed for that notice.
- Not sure which mode your store uses: inspect the published theme's App embeds settings and your Rep Console before deciding the task is complete.
Two ways to activate an existing installation
Rep's guidance allows merchants to use a Turn on Rep prompt in the Rep Console or a reminder email, which opens the Shopify theme editor. If the switch is on, save the change and return to Rep for its confirmation.
Alternatively, enable Rep AI Chat Widget manually from the published Shopify theme's App embeds panel, then click Save.
If you operate several themes, confirm that the activation belongs to the theme customers visit now. If you publish a replacement theme later, verify the embed again. The fact that Rep worked on the previous theme is not a substitute for checking the new one.
Why some older Rep guides mention script injection
You may encounter official documentation describing a setting such as Auto-inject Rep's script tag to my Shopify theme. That wording appears in an earlier integration guide. It documents a historical or alternative configuration surface, but it should not override the more recent, dated instruction about app-embed activation for legacy installations.
The sensible approach is to treat the newer App Embed guidance as the primary procedure for a standard Shopify theme. Do not assume the older option has disappeared from every account, and do not interpret the coexistence of two help articles as proof that manually inserting a script is required for a fresh installation.
 Quentin Olaya
What to do when the Rep AI widget does not appear
This section covers immediate installation checks only. A persistent or complex visibility problem deserves a dedicated troubleshooting process rather than dozens of speculative theme edits.
The Rep onboarding screen still says “Activate Tag”
Return to the Shopify theme editor and confirm that you clicked Save after enabling the app embed. An already-on toggle does not prove the change was stored. If you closed the editor, use Rep's activation control to reopen it, save, and return to onboarding.
The embed is on, but no chat appears during onboarding
This can be normal. Rep distinguishes turning on the embed from launching the assistant. Continue the onboarding and complete the intended launch before calling the installation broken.
Rep says the connection is active, but shoppers see nothing
Check three separate conditions: the correct published theme, the saved App Embed, and the final widget visibility or launch status. A successful Shopify catalog connection alone does not establish any of those conditions.
If the app embed is configured and the assistant has been launched but no chat appears on the live site, gather the store URL, the published theme name, and the symptoms you observed. Contact Rep support rather than asserting that a particular theme or Shopify plan is unsupported without evidence.
Rep AI Chat Widget is missing from App embeds
First make sure you are editing the theme you intended and that Rep is installed for the correct shop. If the embed still does not appear, Rep's official troubleshooting guidance says to contact its support team with the store URL and theme name. The absent menu entry, by itself, is not enough to diagnose a compatibility problem.
The chat disappeared after publishing a new theme
Shopify embeds are configured per theme. Open the newly published theme, check App embeds, enable Rep AI Chat Widget if needed, and click Save. Then review the public storefront again.
Products are missing or answers seem incomplete
Check the Shopify connection and AI Sales → Catalog → Product. Determine whether the product exists in the Rep catalog before assuming that the assistant is simply refusing to recommend it. If the product is present, use Test & Train to investigate the response. Do not promise that all catalog discrepancies resolve after an arbitrary waiting period.
Special cases: headless storefronts, multiple stores, and additional channels
Headless Shopify storefronts
A headless store uses Shopify for commerce functions while its customer-facing frontend may be built separately. Rep documents headless-related configuration and a distinct implementation path. You should not assume that enabling a standard Shopify theme embed will automatically install a chat widget into an unrelated frontend.
For a headless setup, identify the actual frontend architecture and use Rep's corresponding technical documentation. This guide's theme-editor steps are for the standard Shopify Online Store theme route, not a universal JavaScript installation recipe.
More than one Shopify store
If you run several shops, verify the identity and connection of the store being configured. An installed app in one Shopify admin does not itself establish a connection or launch for another store. Record which myshopify.com address, theme, and Rep account you are using for each rollout.
Treat multi-store operations as a separate deployment and administration question. Avoid assuming that every store inherits identical catalog access, billing, or visibility settings.
Email, social messaging, and support integrations
Rep's broader product can participate in workflows beyond storefront chat, but those channels have their own connections and activation conditions. Installing Rep on Shopify should not be represented as automatic authorization to answer customer emails or messages in every supported social application.
Finish the Shopify chat installation first. Add other channels only when your team has reviewed their permissions, response policies, and testing needs.
A sensible implementation plan for a small Shopify team
Even a straightforward integration benefits from ownership. The following division of work is a suggestion for merchant operations, not a required Rep setup process.
Store owner or administrator: reviews app permissions, approves installation, checks the published theme, and confirms any billing choice that appears during launch.
Merchandising owner: spot-checks catalog products, key descriptions, and product-related answers. This person is well placed to catch cases where an assistant recommends an item using information that needs attention.
Customer-support owner: checks shipping and returns answers, uncertain questions, and routes to a human. This is particularly important when an assistant is presented as a support channel rather than only a product-discovery tool.
Whoever owns the storefront: performs final desktop and mobile checks, records the theme used for launch, and makes sure any later theme change includes an app-embed verification.
For a one-person store, the same merchant can perform all four roles. The purpose is to prevent an app installation from being treated as a finished customer-facing rollout without anyone checking content or visibility.
Record the result of your first launch
Keep a short deployment note: install date, store URL, published theme, confirmation that the embed was saved, date of the first successful public chat, and the questions you used for testing. If the storefront changes, this record gives you a clear baseline to compare against.
A record also helps distinguish a later product-data issue from a theme-activation issue. When a chat disappears after a redesign, you can look first at the new published theme rather than assuming you need to reinstall Rep or recreate all the assistant's knowledge.
FAQ: Installing Rep AI on Shopify
1. How do I add Rep AI to my Shopify store?
Install the official Rep AI app from the Shopify App Store, complete the Shopify authorization and Rep onboarding, connect your store, enable and save Rep AI Chat Widget in your published theme's App embeds, then test and launch the assistant. Installing the app alone is not the same as making the chat visible.
2. Where is the Rep AI app embed setting in Shopify?
Open Online Store → Themes, edit your published theme, select App embeds, find Rep AI Chat Widget, turn it on, and click Save. If the entry is unavailable, check that Rep is installed on the intended shop and contact support with the theme name and store URL if needed.
3. Do I need to edit Shopify Liquid code to install Rep AI?
For the standard Shopify theme route documented by Rep, the primary method is a Shopify app embed, not manual Liquid editing. A headless or otherwise customized frontend may have a separate installation process, so avoid applying the standard theme instructions to every architecture.
4. Why is Rep AI not showing after I click Activate Tag?
First check whether you clicked Save in the Shopify theme editor. Then return to the Rep onboarding screen. Also remember that Rep's activation step can precede the final launch: the widget may remain invisible to shoppers until you finish onboarding and make it live.
5. Does connecting Shopify automatically sync products into Rep?
Rep documents automatic Shopify catalog synchronization after connecting the store. You can check the resulting products in AI Sales → Catalog → Product. That does not justify promising an identical sync time or every product-data field being ready instantly.
6. Is Rep AI free to install on Shopify?
The app's Shopify listing describes it as free to install and indicates that a trial is available. That statement is not the same as free, unlimited ongoing use. Review the current subscription and usage terms if you plan to launch, and keep detailed pricing questions separate from installation steps.
7. What is the March 1, 2027 Rep AI deadline?
Rep announced that stores still using its older script-tag installation need to enable the Shopify app embed before March 1, 2027 to keep chat available. If the app embed is already on in the published theme, the announcement says no additional activation is necessary on that account solely for this transition.
8. Will Rep AI stay active after I change my Shopify theme?
Not necessarily. Shopify app embeds are configured separately for each theme. When you publish another theme, verify that Rep AI Chat Widget is enabled and saved in the newly published one, then check the public storefront.
9. Can I test Rep AI before shoppers see it?
Yes. Rep provides Test & Train, including a private Chat simulator, where you can preview and adjust answers before relying on them in public conversations. This is distinct from sending a live customer message. Final storefront checks should still happen after launch.
10. Does installing Rep AI also turn on Instagram, WhatsApp, Facebook, and email answering?
No automatic cross-channel activation should be assumed. Rep's additional channels depend on their relevant integrations and, where applicable, live AI-answering settings. Their test simulations can also differ from what is switched on for real conversations.
11. What if Rep's Shopify integration says Connected but my chat is missing?
Treat the connection and chat visibility as separate checks. Verify the published theme, saved App Embed, launch completion, and widget visibility in Rep. If the issue remains, provide Rep support with your store URL and the relevant theme details for a targeted investigation.
12. Can I use these installation instructions for headless Shopify?
Not unchanged. A headless storefront may need Rep's dedicated frontend implementation rather than the regular theme app embed. Confirm your architecture and follow the headless integration documentation appropriate to your implementation.
Final checklist: Rep AI installed and ready for shoppers
Before calling the project done, confirm each of the following:
- The official REP AI: AI Sales & Support app is installed on the correct Shopify store.
- The app's requested access has been reviewed and approved by an authorized merchant.
- The intended
myshopify.comstore shows Connected in Rep. - The currently published theme has Rep AI Chat Widget enabled in App embeds.
- You clicked Save after enabling the app embed.
- Representative Shopify products are available in Rep's catalog view.
- Basic appearance and sample answers have been checked in Rep.
- The final Rep onboarding and launch or visibility steps are complete.
- The chat opens and answers on the real storefront, including a mobile check where relevant.
- If this was an older script-tag installation, the applicable app-embed transition has been completed before the published deadline.
The essential sequence is simple: install, connect, enable the app embed, save, test, and launch. Keeping those steps separate makes installation easier to verify, helps explain why an installed app may not yet be visible, and gives your team a repeatable way to check Rep whenever the Shopify theme changes.