How to Customize the Rep AI Chat Widget on Shopify: Design, Buttons, and Layout
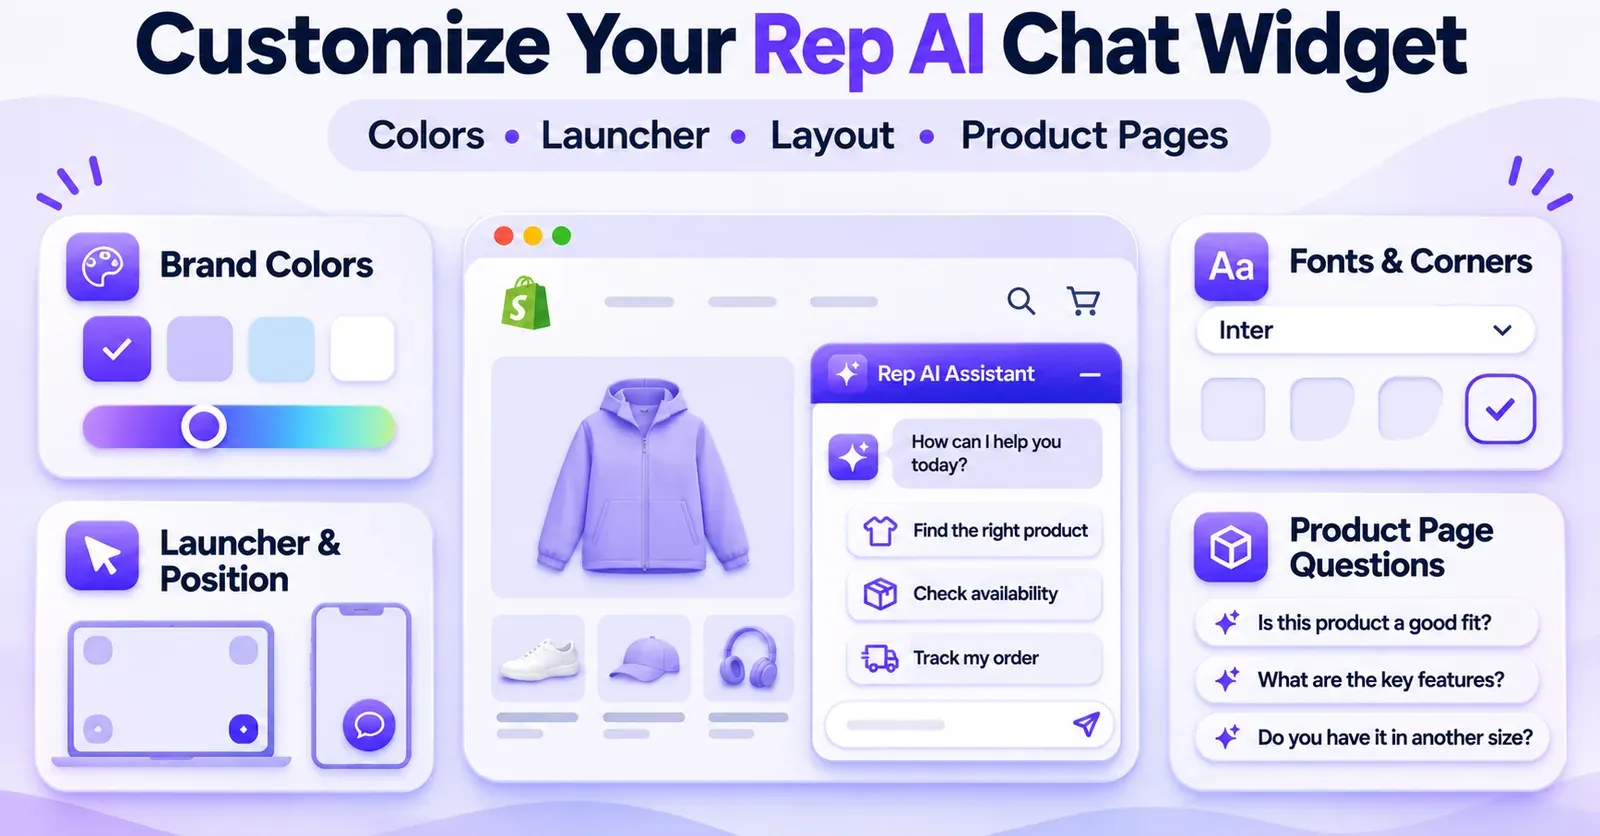
You can customize the Rep AI chat widget from the Rep AI Console, without rebuilding your Shopify theme. Open Settings → Chat Widget → Design to choose a widget style, set brand colors and fonts, adjust the launch button and its position, design conversation shortcuts, and configure product-page question widgets. Use Save and Preview to apply your changes, then check the result on your actual Shopify storefront—especially on mobile.
The important distinction is that Rep AI has several interfaces that look related but serve different purposes. The chat window is where shoppers talk to the assistant. The launcher is the floating button that opens it. Inline product-page widgets place question buttons within a product template. Adjusting one does not necessarily change the others. Likewise, changing the widget's appearance does not automatically change its AI knowledge, sales triggers, or permission to act on orders.
This guide walks through the native design controls, the newer Rep 2.0 options, the product-page integration, and the checks that prevent a polished design from interfering with the shopping experience. Interface labels reflect Rep AI's documentation available in November 2026; the controls visible to you can vary with product updates and account access.
Quick answer: where do you customize the Rep AI widget?
For an already installed Shopify store:
- Sign in to your Rep AI Console.
- Open Settings → Chat Widget.
- Select Design to reach the visual configuration page.
- Start in Basics to choose Classic or Rep 2.0 and establish your branding.
- Continue through Chat Experience, Position, Button, Embedded Widgets, and Menu as relevant.
- Review the widget's Settings, including whether the assistant is active and visible.
- Select Save and Preview and test the real storefront on desktop and mobile.
You generally make widget design changes in Rep AI rather than through the Shopify theme editor. The key exception is an Inline PDP Widget, which can require placing a Rep AI app block on the appropriate Shopify product template and saving it in Shopify as well.
| Rep AI area | What you can customize | What to verify afterward |
|---|---|---|
| Basics | Classic/Rep 2.0, colors, title, subtitle, fonts, corners, branding | Contrast, typography, message readability |
| Chat Experience | Message animation, product-price display, proactive colors, notices | Price rendering, conversation consent |
| Position | Desktop alignment, custom offsets, mobile position, overlap | Sticky cart buttons, banners, mobile view |
| Button | Launcher icon, label, size, colors, mobile variation | Visibility, tap area, notification badge |
| Embedded Widgets | Product-page question entry points | Product template, actual PDP rendering |
| Menu | Top and bottom shortcuts | What each shortcut actually sends to the AI |
| Settings | Storefront preview, active/visible status, technical options | Live visibility rather than preview alone |
Practical rule: save a small group of related changes, preview them, and record what you changed. A controlled process makes it much easier to identify the cause if the widget looks different on a product page or on a phone.
1. Choose between Classic and Rep 2.0
In Design → Basics, Rep AI offers two documented visual styles:
- Classic presents a conventional chat-bubble interface.
- Rep 2.0 uses a richer interface with additional presentation options, including a configurable widget title and subtitle.
Neither style should be treated as proof of better AI accuracy, faster responses, or a different set of Shopify permissions. This is first and foremost a presentation decision. A clean Classic layout might suit a store that wants a discreet support channel. Rep 2.0 may suit a store that wants the assistant to feel more like a branded shopping service.
Edit the widget title and subtitle
For Rep 2.0, the Widget Title can contain up to 25 characters. The Widget Subtitle adds supporting context. The official documentation does not establish an identical character limit for the subtitle, so preview longer copy instead of assuming it will fit.
Possible copy, offered as editorial examples rather than official presets:
- Title: Style Assistant; subtitle: Find your next favorite piece.
- Title: Product Expert; subtitle: Ask about fit, materials, and options.
- Title: Shopping Help; subtitle: Answers while you browse.
Prefer language that accurately describes what the configured assistant can do. For example, calling it a personal stylistcould overpromise if the store has not prepared its product information for styling recommendations. Similarly, a title such as Live Support can mislead shoppers if no human is continuously available.
Check the header in a narrow mobile layout. A title that fits on a desktop screenshot can crowd a close button or truncate on a phone. Keep the assistant's identity recognizable without trying to put your entire value proposition into a 25-character title.
2. Match your Shopify store's brand colors
Open Design → Basics → Colors. Rep AI documents distinct controls for the Primary, Secondary, Background, and chip text/border colors. These govern important visual surfaces, such as primary interface elements, message bubbles, chat-window backgrounds, and the borders and text of suggestion chips.
A practical starting point is to extract a small palette from your actual theme: one primary action color, one secondary surface color, a neutral background, and high-contrast text. Avoid picking five vibrant colors just because the controls allow them. The widget should be recognizable as part of the storefront, not another competing advertisement.
A sample color-planning method
Imagine a store with dark blue headings, a lilac accent, and an off-white background. You could use the existing lilac for interactive accents, a pale surface for secondary panels, and a light background for the main window. This is a design example, not a preset guaranteed by Rep AI. The exact mapping of each color setting should always be checked in the Rep preview.
When evaluating the design, ask:
- Can shoppers distinguish their own messages from the assistant's replies?
- Can the text inside suggestion chips be read at a glance?
- Do product names remain legible next to their images and buttons?
- Is the close icon apparent when a proactive bubble appears?
- Does the launcher stand out against both a light product page and a dark footer?
The color of the floating button has its own settings under Button. Therefore, changing the primary widget color does not remove the need to inspect the launcher separately.
Avoid accidental visual conflicts
Look for sticky promotion bars, chat-like widgets from other apps, review badges, and accessibility controls. When two floating elements use similar colors or occupy the same corner, a shopper may mistake them for one feature. A good design creates a clear hierarchy: shopping actions remain primary, while help remains easy to discover and open.
Save your selections with Save and Preview. Then check a new storefront session; some visual changes are documented as taking effect for new sessions rather than retroactively changing a conversation someone already has open.
3. Upload your logo and choose a brand font
Use your store's icon
To display your own icon, Rep AI's documentation directs merchants to Settings → General → Upload Your Icon. The uploaded icon can appear in the opened widget, including the header and next to assistant replies. It can also be used as the closed launcher when you choose Store icon under Button.
Do not assume that merely uploading a logo into Shopify's theme settings also uploads it into Rep AI. They are different configuration surfaces. Likewise, the public instructions do not establish universal image-format, file-size, or cropping guarantees. Inspect the final result rather than relying on a file preview.
For a small launcher, the most detailed version of your logo may not be the most legible. Consider whether your mark remains identifiable at compact sizes. Use an icon that you have the right to display, and check it on light and dark backgrounds.
 Quentin Olaya
Select a font preset
Rep AI has a native Font control under Design → Basics. Its documented presets include Inter, Poppins, Montserrat, Roboto, Open Sans, Assistant, DM Sans, Nunito Sans, Playfair Display, and Lora. These can apply to the chat window, launcher text, proactive messages, menus, and embedded widgets.
A preset is often the simplest choice. It avoids the need to host a font file and makes visual consistency easier to maintain. Choose a typeface that resembles your theme while retaining enough readability for longer messages and smaller phones.
Link a custom WOFF2 font
If your brand uses a different typeface, the Custom font option accepts a direct, publicly reachable HTTPS URL to a .woff2 font file. The hosting server must permit the font to be loaded by another site. Rep AI references the file at your URL; it does not copy the font and host a separate version for you.
Before you save, check that:
- The link points to the font file itself rather than a preview webpage.
- The font includes the characters used by your storefront languages.
- The font license permits the intended web use.
- The file remains available on a stable URL and its server supports cross-origin loading.
- The preview renders more than just the English widget title; test product names and other languages too.
The console can reject a link it cannot load and warn when the file lacks required characters. A working URL is therefore necessary, but not sufficient: a font can load correctly and still omit a script needed for multilingual shoppers.
Important: native custom-font support is not the same as permission to inject arbitrary CSS into the widget. The former is a standard design control; direct CSS access involves a separate, restricted option discussed later.
4. Adjust corner roundness consistently
Under Basics → Colors, Rep AI documents one Corner roundness control with four exact options:
| Option | Visual effect | Possible brand fit |
|---|---|---|
| Sharp | Square corners | Architectural or minimalist design |
| Subtle | Slightly softened corners | Restrained business-style storefront |
| Rounded | Noticeably rounded corners | Modern retail storefront |
| Full | Maximum roundness; default | Soft, friendly conversational interface |
These are broad style descriptions, not recommendations based on measured conversion data. The control applies across many surfaces: chat shell, message bubbles, chips, inputs, product cards, buttons, menu items, avatars, and the launcher. It also affects desktop and mobile views.
This is more coherent than trying to round only the main window while leaving all the chips square. At the same time, it is not a per-element radius editor. You cannot infer that selecting Rounded exposes individual radius values for every card and button.
An easy check is to move from Full to Sharp in the preview and watch the difference in the launcher, cards, and message bubbles. If you return to Full, the result may appear unchanged because it is already the default. Save the chosen value, then confirm it in a fresh session on the storefront.
5. Customize how the conversation looks and feels
The Chat Experience tab controls elements shoppers see while conversing with Rep AI. These are display choices rather than a replacement for training the assistant or configuring its sales and support actions.
Typing effect versus instant display
Rep AI documents two message-display modes:
- Typing effect: characters appear progressively, resembling typed conversation.
- Instant display: the complete message appears at once.
Pick a mode based on how your shoppers use the site. Long technical explanations may be easier to scan when they appear immediately. A progressive animation can create a more conversational feel, but it is not proof that the AI itself is generating text faster or slower.
Test a short reply, a long reply, and a reply with several product suggestions. Check the mobile experience and, where relevant, have users assess accessibility. Avoid equating animation style with AI performance.
Hide or display product prices in chat
The Hide Product Prices option removes price information from product cards in the chat carousel. The documented behavior includes current price, sale price, original price, and Starts from displays. Product images, names, and available action buttons remain visible. The setting is off by default.
This can be useful for a merchant who wants product conversations to focus on fit or discovery, or whose product prices are usually confirmed by quotation. But the scope matters: hiding prices in the widget carousel does not establish that prices disappear from Shopify product pages, checkout, other site components, or every possible sentence generated by the assistant.
If shoppers need pricing to compare variants or understand a sale, hiding all carousel prices may create friction. If you enable this feature, test whether a customer can still make an informed decision and where the full price can be found.
Show full price precision in Rep 2.0
A newer Show full price precision control is documented for Rep 2.0 and is available on all plans. It is off by default. In Chat Experience, it appears below Hide Product Prices.
For example, a round US dollar product price can appear as $55.00 instead of $55, matching a storefront that consistently displays cents. The number of decimals follows the currency: Japanese yen does not gain artificial decimal places. The option affects documented product-card price presentations and price values used in preparing relevant chat replies.
Two checks prevent misunderstandings. First, test a round-number price; $6.50 can look unchanged with the setting on or off. Second, ensure Hide Product Prices is disabled. Full precision cannot make a deliberately hidden carousel price visible. Neither setting should be represented as a correction for incorrect source prices in Shopify.
Style proactive messages separately
Rep AI provides separate color choices for proactive approach messages, including the bubble, the close control, and the suggestion chips. That means a proactive invitation can be visually distinct from a regular chat reply.
However, changing the appearance of an approach is not the same as configuring when it is triggered. Availability, targeting, frequency, and control groups are governed by other sales settings. A redesigned proactive message is not guaranteed to appear on every visit, and its appearance should not be confused with evidence of higher conversion.
Make the close control easy to find, keep text readable, and consider whether the prompt competes with your add-to-cart button on small screens.
6. Configure disclaimer messages and Shopify consent
Under Design → Chat Experience, Rep AI documents a Disclaimer message with two display modes:
- Require consent before chat, prompting shoppers to accept a notice before they can chat.
- Show as persistent footer note, displaying the notice below the input field.
The maximum is 500 visible characters, and the editor supports links and bold formatting. Write a statement that accurately describes the particular store's assistant and data practices; do not treat a generic disclosure as a substitute for your privacy review.
The separate Use my store's cookie banner integration, documented in November 2026 for standard Shopify storefronts, can make Rep AI follow consent already recorded through Shopify. This is off by default. It requires the store's banner or consent app to pass both analytics and marketing choices to Shopify. If either permission is absent, the widget can show a notice and block sending a message, even though the chat interface is visible.
This setting is not documented for headless Shopify or non-Shopify installations. The consent notice does not replace the store's banner and does not necessarily open cookie settings for the shopper. If you also use a Rep disclaimer, that notice still has its own place in the experience.
For QA, use a new browser session and test at least three cases: both permissions granted; analytics granted but marketing declined; and no choice made. Verify the actual result on your store and check applicable legal requirements independently. The existence of the setting is not a blanket claim of regulatory compliance.
7. Place the widget where it helps, not where it blocks purchases
The Position tab provides bottom-right, bottom-left, and Custom positioning choices. Custom placement allows pixel offsets along the horizontal and vertical axes. You can also configure a separate position for mobile.
Start by looking at the pages customers actually use. A floating chat button that looks harmless on the homepage can cover a size selector on a product detail page or a sticky checkout bar on a mobile cart page.
A storefront-safe placement checklist
Inspect your storefront with the chat closed and open:
- Homepage: Does the launcher compete with a newsletter popup or promotion?
- Collection page: Can shoppers still use filters and sort controls?
- Product page: Is the price, size selector, or add-to-cart button unobstructed?
- Cart: Does the chat overlap a sticky checkout action?
- Help pages: Does it collide with a support button or accessibility control?
- Mobile: Does the layout work in both narrow and larger phone widths?
The setting Hide Chat Window Under Elements can adjust stacking behavior so the window appears behind specified page elements. It is not a guarantee that every CSS collision will disappear. Themes can introduce stacking contexts, clipped containers, and sticky components that need further testing.
 Quentin Olaya
Understand what shoppers can move themselves
Desktop and mobile have different documented drag behaviors:
- On desktop, shoppers can drag the open chat window when it is not in full-screen mode. Its moved position lasts for the session; a new session begins at the configured position.
- On mobile, shoppers can move the closed floating launcher icon. It snaps toward a screen edge and can remember the chosen location on that device across visits. The full-screen mobile chat itself is not the draggable object.
This matters when you evaluate placement. Your Console choice is a starting position, not necessarily a permanently enforced position on every returning shopper's phone. Do not conclude that mobile positioning is broken because a shopper previously moved the launcher.
Choose compact or full-screen desktop opening
Rep AI also documents a Desktop Default Open Mode for new desktop visitors, with a regular chat window or full-screen view. Once a shopper has selected a mode, that preference can be remembered. Changing the merchant default therefore does not necessarily override existing preferences for returning visitors.
Full-screen can suit richer product discovery conversations, but it creates a more dominant interaction. Evaluate whether customers need to refer to the product page while chatting. For shopping flows involving sizes, colors, and comparison, retaining visibility of the storefront may be valuable.
8. Customize the floating chat launcher
The Button tab governs the element a shopper presses to open Rep AI. The documented choices include Store icon, Round chat icon, With text, and Hidden. Four size categories are listed: Extra Large, Large, Normal, and Small.
You can also adjust button color, notification color, and mobile style/size separately. With the With text style, the launcher label supports up to 30 characters.
Pick an honest, helpful label
A short label is usually more useful than a generic marketing promise. Consider Ask about a product, Need sizing help?, or Chat with our assistant. These are suggested copy examples, not built-in Rep AI labels. Use copy that aligns with the assistant's configured knowledge and availability.
Check the label at mobile widths, particularly if the button sits near a sticky CTA. A wordy launcher can become more intrusive than a round icon. On the other hand, an unfamiliar icon may not clearly communicate that it opens shopping assistance. This is a UX tradeoff to test, not a universal winner.
What does Hidden actually hide?
Selecting Hidden removes the floating launcher button. It does not by itself prove that the Rep AI account has been deactivated, all embedded widgets have disappeared, or every proactive entry point has stopped operating.
The separate AI Concierge Active and Visible master control governs whether the assistant is shown on the storefront. Keep these options conceptually separate:
| Control | Documented purpose | Do not assume |
|---|---|---|
| Button → Hidden | Hide the floating launch button | Entire AI service is switched off |
| Settings → AI Concierge Active and Visible | Control main storefront visibility | Subscription is canceled |
| Embedded Widgets | Show entry points on product pages | Floating launcher is required |
If you deliberately want an inline-only customer experience, test every remaining entry point. If your goal is to temporarily remove the assistant from the storefront, review the master visibility control rather than relying only on launcher styling.
9. Design useful menu shortcuts
The Menu tab supports Top Menu Shortcuts and Bottom Menu Shortcuts, with optional icons and controls for adding, editing, ordering, or removing items. A shortcut has two separate elements: the label shoppers see and the message it sends to Rep AI when clicked.
That distinction makes a shortcut more than a decorative menu link. For example, a label such as Find a gift could send a request asking for a recommendation within a specified budget. However, the content of the request still depends on the assistant's actual capabilities and available data.
A useful process is to choose a small number of top actions, write plain-language labels, and then test each underlying message. For a fashion store, that might mean product recommendations, sizing questions, and order help. For a home-improvement merchant, compatibility or material questions might be more appropriate.
Avoid menu items such as Cancel my order now unless the necessary order actions are enabled and the eligibility checks are understood. A shortcut cannot bypass authorization, inventory, authentication, or support limitations merely because it is displayed in the menu.
Menu shortcuts are not the same as Sales Skill chips
Rep AI also provides Additional suggestion chips in AI Sales → Sales Skills → Settings. Each custom chip has a visible Label and a Full Shopper's Request sent to the assistant. Some chips belong to a system flow and are not editable. These are associated with particular Sales Skills, whereas Menu shortcuts occupy the widget menu.
A third type of chip can appear directly on product pages through the Inline PDP Widget. The three types may resemble one another to shoppers, but the controls and contexts differ. Keep the purpose of each clear: menu navigation, skill-specific prompts, and product-page entry points.
10. Add questions directly to Shopify product pages
The Inline PDP Widget is a distinct way to introduce Rep AI on product detail pages. It displays clickable questions alongside product information. Clicking a question opens the full chat with that question already submitted.
Rep AI's November 2026 documentation describes up to five chip positions and three modes: AI-generated, Mix my chips with AI chips, and Only my chips. The AI-generated questions can differ between products; they are not guaranteed to fill every position on every product page.
Shopify theme-editor method
For a standard Shopify storefront, the documented route is:
- Open Settings → Chat Widget → Embedded widgets in Rep AI.
- Turn on Inline PDP widget.
- Enter a title, up to 50 characters, or leave the default Ask your Concierge.
- Choose Theme editor, the recommended placement method for Shopify.
- Select Adjust in theme editor and open the relevant Shopify product template.
- Place the Rep AI product questions app block where it belongs in the product experience.
- Click Save in Shopify.
- Return to Rep AI and click Save and preview to save the widget settings and refresh the placement check.
- Open actual product pages to verify questions, layout, and behavior.
Use one block per intended placement rather than repeatedly adding new ones. Duplicated blocks may create repeated question groups. Remember that a custom Shopify theme can have several product templates, not one universal layout. Adding the block to one template does not prove it is present everywhere.
The Shopify theme-editor preview may contain example placeholder questions, so the preview is not final proof of which chip labels shoppers will see. Test a live product page after saving both surfaces.
Custom containers are for more technical storefronts
Rep AI also documents Custom container placement for developer-led implementations, page builders, or headless frontends. It requires a case-sensitive HTML element identifier, with specific character and length rules, and corresponding containers where the widget must appear on desktop and mobile.
Do not add a generic container to every Shopify theme merely because an older instruction references a default ID. The current Shopify-specific workflow favors the app block for standard storefronts. Custom containers are appropriate only when the store's implementation warrants them and a developer can validate the placement.
Check the product-page result
Use products from different categories and templates. Verify that the questions do not obscure product details, that the chat opens with the intended prompt, and that any sticky bars or overflow rules do not clip the widget. Also verify whether the current placement status in Rep AI needs a fresh Save and preview after a Shopify-only change.
These question widgets can give shoppers convenient entry points, but their existence is not evidence of a measured conversion uplift. Evaluate interactions and outcomes using your own storefront data and a suitable comparison method.
 Quentin Olaya
11. Can you customize Rep AI using Shopify CSS?
Not by default in the way you might expect. Rep AI's standard chat widget runs inside a Shadow DOM, which isolates its internal styles from the rest of a storefront. Adding broad CSS rules to a Shopify theme therefore does not normally give unrestricted control over the widget's internal elements.
Rep AI documents a direct CSS option for selected Enterprise merchants by request. Once approved, an account administrator can enable Disable Shadow DOM under Chat Widget settings. The widget then becomes accessible to the site's normal CSS rules. This option is not presented as universally available to self-serve accounts or automatically enabled for every Enterprise store.
The extra freedom also creates risk. Shopify theme styles can collide with widget styles, and Rep AI may change internal class names during product updates. An override that works today might require maintenance after an update. Use narrow, tested selectors, avoid sweeping rules that affect all buttons or div elements, and retain a way to revert the change.
The safer default: use built-in controls for colors, fonts, rounding, positioning, and launcher design. Escalate to custom CSS only when those options do not meet an actual design requirement and the account has the necessary access.
12. Save, preview, and verify changes on the real storefront
In the design interface, Save and Preview saves settings across the relevant customization tabs. However, it is not a substitute for inspecting the storefront. A preview cannot reliably represent every mobile viewport, alternate Shopify template, consent state, or overlay installed by another app.
For regular visual changes, save in Rep AI and visit the store. For Inline PDP Widgets, make sure you have also saved the Shopify theme editor. These are two distinct steps.
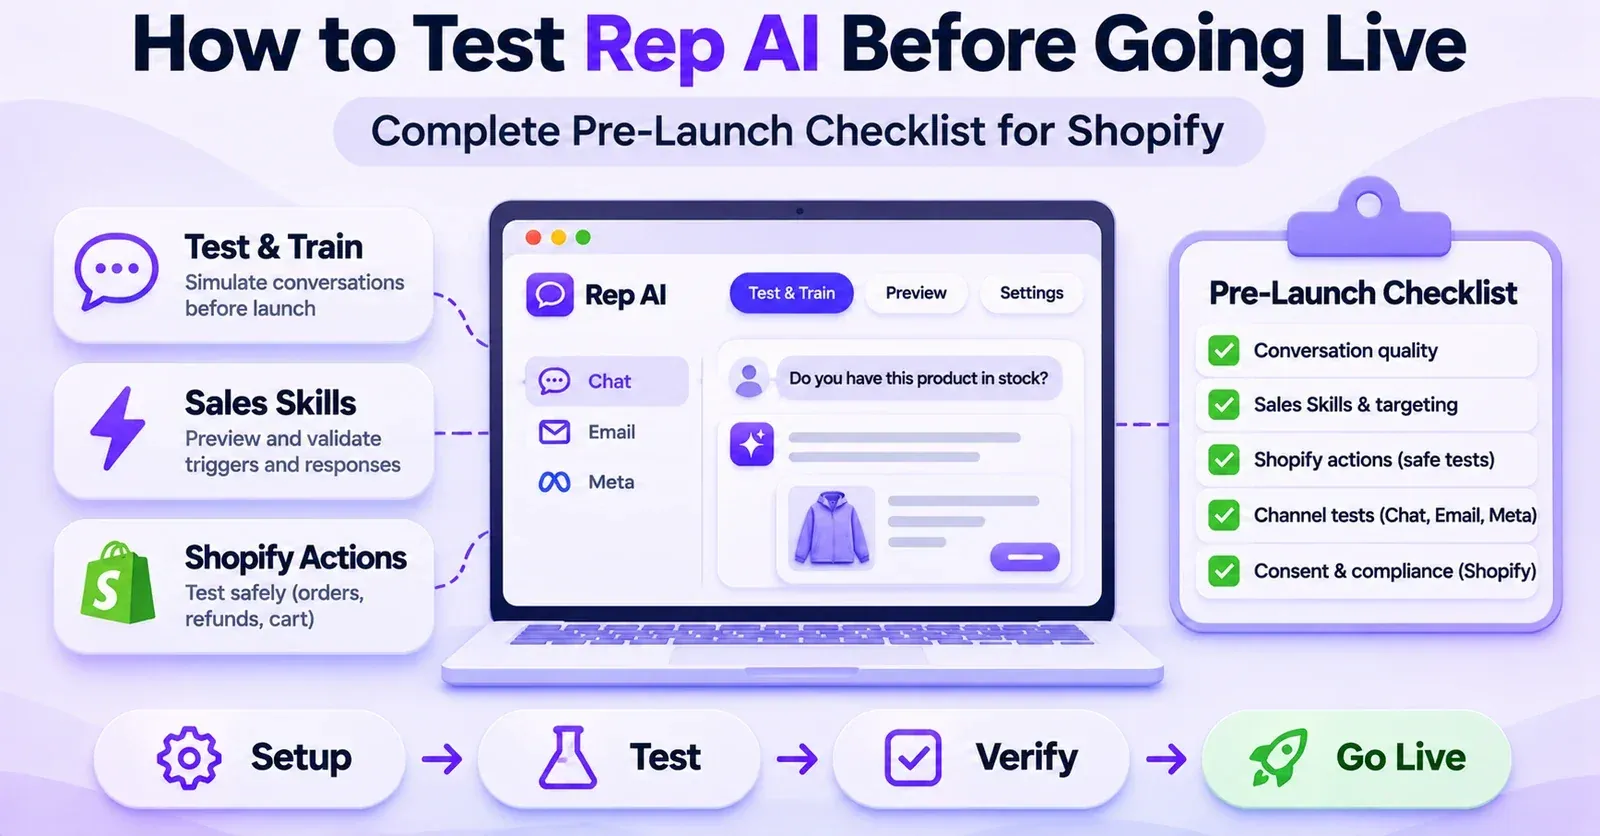
A practical quality-assurance pass should include:
| Test | What to check | Pass criterion |
|---|---|---|
| Desktop homepage | Launcher and opened chat | Clear, visible, not covering main CTA |
| Product page | Product cards and question chips | Correct data and readable controls |
| Alternate product template | Inline PDP app block | Present where intended, not duplicated |
| Mobile product page | Launcher, sticky cart, full-screen chat | Shopper can reach every key action |
| Collection page | Filters and floating UI | Chat does not block filtering |
| Long conversation | Typography and message rendering | Readable, usable scrolling |
| Multiple currencies | Product price display | Matches intended format for each currency |
| Consent declined | Cookie-banner integration | Behavior matches store's chosen setup |
| Keyboard/accessibility | Focus and controls | Usability verified by actual test |
| Returning visitor | Saved window preference or icon position | Expected behavior understood |
These are editorial QA recommendations, not an official Rep AI certification checklist. Record the device, browser, theme version, tester, and date. If something changes after a Shopify theme update, compare the new environment with that record.
What if the preview looks right but the storefront does not?
Check which layer owns the change. If colors or fonts are wrong, verify the Rep AI save and start a fresh chat session. If a product-page widget is missing, inspect the exact Shopify product template and confirm the app block was saved there. If the launcher is gone, inspect both the Button style and the AI Concierge Active and Visible setting.
If a component is clipped or overlapping another element, test position and stacking before attempting CSS overrides. If the issue only appears in one browser or consent state, document those conditions. This guide covers the design-related checks; a general integration failure belongs in a broader troubleshooting process.
13. Three practical customization scenarios
Scenario A: a minimalist fashion store
The store uses a restrained layout, monochrome buttons, and a compact mobile product page. Start with the widget style that best fits its design, select neutral colors, and use Sharp or Subtle corners if those match the theme. Choose a small launcher with a short label rather than a large, bright bubble.
Place the launcher where it does not cover size selectors or the sticky add-to-cart button. Test a product recommendation on desktop and mobile. If the store wants to show fewer price details in chat, evaluate Hide Product Prices carefully; do not assume it removes prices from the store itself.
Scenario B: a guided-shopping cosmetics store
Here the chat can feel like a shopping assistant. Rep 2.0 may provide useful branding space for a descriptive title and subtitle. Use the store's color palette, a legible sans-serif font, and clear menu shortcuts such as Find my routine or Explore products—provided the assistant's configured content supports those requests.
Consider adding the Inline PDP Widget below the product description or near the purchase decision area. Questions about product compatibility or usage should be checked against genuine product information, not invented answers. Test multiple product families so the selected chips make sense beyond one example item.
Scenario C: a multi-market wholesale store
This store has different currencies, quote-based products, and customers across several regions. Check the font's character coverage, preview the chat in the languages the store actually uses, and inspect product cards with multiple currencies. The Hide Product Prices option may help if prices are not appropriate for conversational display, but verify how customers can obtain accurate prices elsewhere.
Review the Shopify consent integration in relevant regions and check the behavior when shoppers have not granted the required analytics and marketing choices. Do not assume one successful US-dollar desktop preview validates every market, language, and privacy setting.
14. Common customization mistakes to avoid
Changing Shopify theme CSS and expecting the widget to inherit every rule. The standard Shadow DOM prevents that expectation. Use native controls; request approved Enterprise CSS access only if needed.
Treating Hidden as uninstall. Hidden is a launcher style. It is not evidence that Rep AI has been removed, canceled, or stopped across every entry point.
Using Rep 2.0 options in a Classic-only setup. The title/subtitle and full-price precision features have documented style-specific scope. Check the selected widget style before following those instructions.
Setting the same position on desktop and mobile without testing. The screens have different sticky controls, and shoppers may move the closed mobile launcher themselves.
Adding multiple PDP blocks. A duplicated Shopify app block can show duplicate questions. Move the existing block and verify product templates instead.
Using a visible shortcut as a promise of functionality. A Track order or Return an item label does not grant Shopify permissions or prove that the assistant can complete the entire operation.
Assuming a consent notice is legally sufficient everywhere. A display setting cannot replace a jurisdiction-specific review of privacy and consent.
Judging success from preview alone. A beautiful console preview is not a responsive QA test on the published theme.
Final checklist: a branded widget that still works for shoppers
Before considering your customization complete, verify that the selected Classic or Rep 2.0 design is appropriate, the title and launcher copy are accurate, colors and fonts are readable, and the chat does not cover essential store actions. Confirm that the visible menu options correspond to real assistant capabilities, product cards show the intended price presentation, and disclaimer or cookie consent flows behave as configured.
If you added product-page questions, verify the app block on every relevant Shopify template and remember the two separate saves: Shopify for placement, Rep AI for widget settings. If you use restricted CSS customization, include theme and widget updates in your maintenance process.
The goal is not simply to make Rep AI resemble your Shopify theme. It is to make assistance discoverable, consistent, and usable without distracting shoppers from choosing and buying the right product. A careful storefront review is the final step that turns console settings into a reliable customer-facing experience.
Frequently asked questions
1. Where are the Rep AI chat widget customization settings?
Open the Rep AI Console, go to Settings → Chat Widget, and select Design. The documented design experience includes Basics, Chat Experience, Position, Button, Embedded Widgets, Menu, and Settings. Your account's presentation may differ as the interface evolves.
2. Can I match Rep AI to my Shopify store's brand colors?
Yes. You can configure key visual colors in Basics, including primary and secondary colors, background, and suggestion-chip text and borders. The floating launcher has additional controls in Button. Preview the whole experience, not just the primary color swatch.
3. Can I change the Rep AI chat widget font?
Yes. Rep AI documents native preset fonts and a custom-font option that points to a publicly reachable HTTPS .woff2 file. The file's host must allow cross-site loading, and you are responsible for its licensing and character coverage. The setting works with Classic and Rep 2.0.
4. Can I add my own logo to the Rep AI launcher?
Rep AI documents Settings → General → Upload Your Icon for your icon. Then select the Store icon launcher style. Verify that the logo renders correctly at small dimensions rather than assuming the Shopify theme logo is automatically reused.
5. Can I move the Rep AI chat button on mobile?
Yes. The merchant can configure a mobile starting position, and shoppers can also drag the closed floating launcher iconto a preferred edge position. The choice can be remembered on that device. This is different from moving the open desktop chat window; the mobile full-screen chat is not draggable in the same way.
6. How do I make Rep AI's chat window full-screen?
The widget's Desktop Default Open Mode can start new desktop visitors in a regular window or full-screen view. Existing shoppers may retain their previous preference. This should be tested with both fresh and returning browser sessions.
7. Can I hide the Rep AI chat button without disabling the assistant?
The Hidden option hides the launcher button. Other entry points, such as embedded question widgets, should be checked separately. To control overall storefront visibility, inspect AI Concierge Active and Visible in the widget settings.
8. Can I hide prices inside the Rep AI chat?
Yes, the Hide Product Prices setting is documented for product cards in the chat carousel. It does not establish that Shopify product-page prices, checkout values, or all conversational text become invisible. Test the complete purchasing experience before enabling it.
9. Can Rep AI show prices with cents?
Rep 2.0 includes Show full price precision. It can render a round US dollar amount such as $55.00 instead of $55, while following other currencies' normal decimal conventions. It will not show a price that you have hidden with Hide Product Prices.
10. Can I add suggested questions on Shopify product pages?
Yes. Enable the Inline PDP Widget, choose a chip mode, and use the Shopify theme editor to place a Rep AI product questions app block on the relevant product template. Save in Shopify, then save and preview in Rep AI. Validate the result on real product pages.
11. How many questions can the Inline PDP Widget display?
The documentation describes up to five chip positions. Depending on how you configure AI-generated questions and on the product data, fewer questions may appear. The maximum of five should not be confused with the limits for widget title or launcher text.
12. Can I style the widget using my own CSS?
By default, the Shadow DOM isolates the widget from ordinary Shopify theme CSS. Direct CSS customization is documented for selected Enterprise merchants, by request and approval, via an admin-controlled Disable Shadow DOM setting. It requires testing and may need maintenance after Rep AI updates.
13. Why do I see different customization options from an older tutorial?
Rep AI's interface and dedicated features have evolved. Some older instructions show different menu levels or a custom-container approach for product-page widgets. Follow the current Console labels and the newer Shopify theme-editor method when it applies to your store, rather than forcing every historical step into the same process.
14. Does customizing the widget automatically improve conversions?
No specific conversion increase is guaranteed by the design controls. Better readability and placement may reduce friction, but measurable impact depends on traffic, product mix, assistant quality, merchandising, and shopper behavior. Compare real outcomes using appropriate tracking and a sensible testing method rather than treating an attractive preview as proof of commercial results.